
In this blog I will reveal and explain the journey taken to understanding and developing in Physical Computing. More specifically using an Arduino Leonardo. This blog will detail my journey getting to know Arduino and my experiments doing so.
I’m a Bath Spa University student, studying Creative Computing Bsc and am taking part in the module Physical computing.
Introduction to Arduino
An Arduino is made up of a physical programmable circuit board, known as a micro controller, and a software IDE that runs on your computer (ie my laptop). Using code written in a simplified C++ language that enables you to make digital devices that are interactive both physically and digitally. Here is a link to see some Arduino experiments…
https://www.youtube.com/watch?v=eJg3yuAAawA
I am using the Arduino Leonardo. Which was released in 2012. The Arduino is a micro controller board based on the ATmega32u4 microchip. With 20 digital input pins, 7 of which can be used as pulse-width modulation. Pukse width modulation involves being able to control components such as motors or the brightness of leds using an analogue signal in a digital environment, learn more about this and Arduino at https://electronicshobbyists.com/arduino-pwm-tutorial/. Arduino also contains a 16MHz crystal oscillator, a micro usb, a power jack, an ICSP header (in-circuit serial programming) and a reset button. The ICSP is used to upload code to the device.
The Arduino contains everything you need to use the micro controller by connecting it to a computer by usb. This is what an Arduino Leonardo looks like…
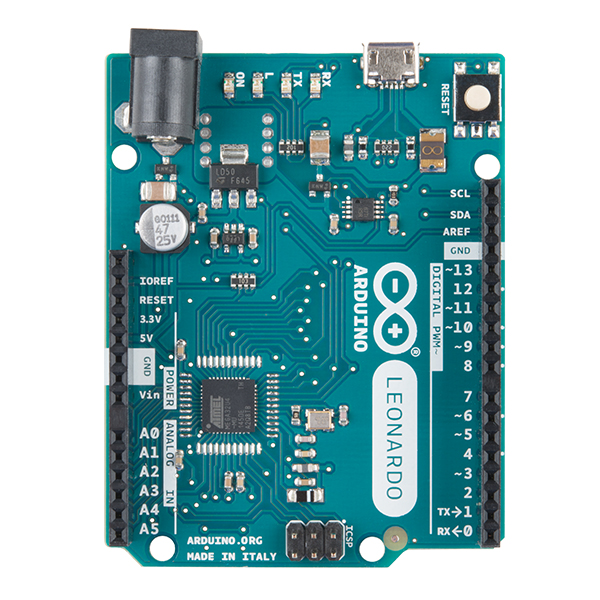
At the moment I have a Arduino Leonardo, a micro usb lead, a bread board, 5 LEDs, 5 resistors, an LDR sensor and 8 small wires. This is all the kit I have at the moment having not bought any more specialised parts…


Here is the bare bones of the Arduino IDE interface for the code of our programs. You may notice a function void setup and void loop. The basic function of setup is to set up instances of variables or assign values to them, so if a program is dynamic which Arduino programs usually are you would create the starting point of these values in setup. You may also set and initialise pins and components you use here such as this wake up function used for a driver chip lc.shutdown(0, false); or the pinMode to one that you are using and give it a number such as pinMode(6, OUTPUT), which sets pin 6 as output and allows you to change the voltage.
The very top of the program outside the setup is also used to create declarations of variables where they are public global variables.
The function loop is where most of the programming takes place unless you create a specific function to call independently. Which you might do if you repeat yourself in your code for specific reasons and you want to improve and shorten your code. The loop function does exactly what it says, it repeats itself 16,000,000 times a second but is slowed down slightly by peripheral connection made to it.
Hopefully that is enough information to understand the basics of Arduino.
